Beyond Band-Aids: A Guide to Bleeding Control

In the aftermath of a serious traumatic injury, the clock starts ticking. Uncontrolled bleeding is the number one preventable cause of death after trauma, meaning the actions taken in the first few minutes are the most critical. While a basic first aid kit is essential, it's not equipped to handle severe hemorrhage. This guide is a primer on the tools and techniques used for advanced bleeding control.
Disclaimer: This guide is for informational purposes only. It is not a substitute for professional, hands-on medical training. We strongly encourage you to seek out a certified course, like a "Stop the Bleed" class, to gain the skills and confidence to act effectively.
Recognizing Life-Threatening Bleeding
You must first recognize when a situation requires more than a simple bandage.
-
Arterial Bleeding: This is the most serious. Blood from an artery is bright red and will spurt or pump from the wound in time with the person's heartbeat. This requires immediate, aggressive intervention.
-
Venous Bleeding: Blood from a vein is darker red and will flow steadily from the wound. While still serious, it is typically easier to control than arterial bleeding.
Tool #1: The Tourniquet
A tourniquet is a tool of last resort for the most severe bleeding, but when it's needed, it's the only thing that will work.
-
When to Use a Tourniquet: A commercial tourniquet should be used for life-threatening, massive bleeding from a limb (arm or leg) that cannot be controlled by direct pressure.
-
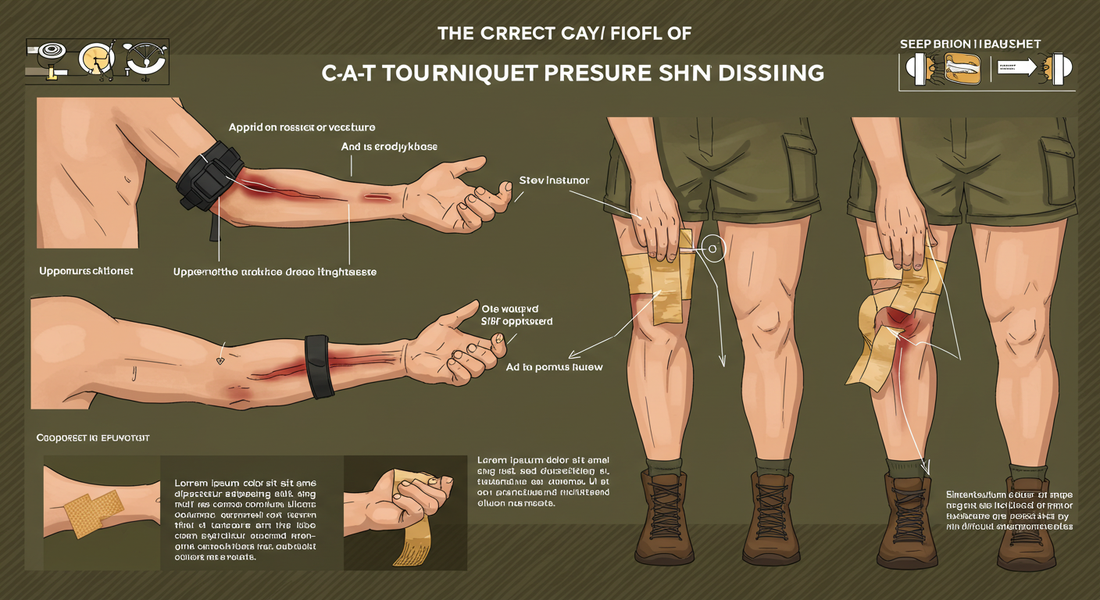
Step-by-Step Application (C-A-T Tourniquet):
-
High and Tight: Apply the tourniquet as high up on the injured limb as possible ("high and tight"). It can be applied over clothing.
-
Pull the Strap: Route the strap through the buckle and pull it as tight as you possibly can. Secure the strap back on itself. This initial tightness does most of the work.
-
Turn the Windlass: Turn the windlass rod until the bleeding stops completely. This will be painful for the injured person, which is a sign you are doing it correctly.
-
Secure the Windlass: Lock the windlass rod into the clip to secure it in place.
-
Note the Time: Use the white strap or a marker to write down the time the tourniquet was applied. This is critical information for medical professionals.
-
-
Common Mistakes: Do not apply a tourniquet too loosely. Do not remove a tourniquet once it has been applied; only a medical professional should do this.
Tool #2: The Pressure Dressing (Israeli Bandage)
For severe bleeding that doesn't require a tourniquet, or for wounds on the torso or head, a pressure dressing is the right tool.
-
When to Use: Use a pressure dressing for deep cuts with heavy bleeding that you believe can be controlled with direct pressure.
-
Step-by-Step Application:
-
Place the Pad: Place the sterile pad of the dressing directly onto the wound.
-
Wrap the Leader: Begin wrapping the elastic leader tightly around the limb, over the pad.
-
Use the Pressure Bar: After the first wrap, thread the leader through the built-in pressure bar and then wrap it back on itself in the opposite direction. This unique feature focuses all the pressure directly onto the wound.
-
Continue Wrapping: Continue to wrap the leader tightly up the limb, covering all edges of the pad.
-
Secure the Clip: Use the closure clip at the end of the bandage to secure it in place.
-
Conclusion: The Power to Save a Life
The skills to control severe bleeding are some of the most empowering you can learn. By taking a certified course like "Stop the Bleed," you gain the knowledge and muscle memory to act decisively in a high-stress situation. Keep your trauma supplies—tourniquets, pressure dressings, and hemostatic gauze—in a clearly marked, easily accessible trauma first aid kit in your home and vehicle. In a true emergency, you are the first responder, and having the right tools and training gives