How to Build a Quick Emergency Shelter with Just a Tarp

In a survival situation, the elements are your greatest enemy. A quality shelter is not a luxury; it's a life-saving priority. While tents are comfortable, nothing beats the sheer versatility and lightweight utility of a simple tarp. A durable tarp and a bit of cordage can be transformed into a surprisingly robust and weatherproof shelter in minutes, making it the most essential piece of shelter equipment in any prepper's go-bag. However, knowing how to build a tarp shelter is only half the battle. Your success begins with choosing the right location. Always remember the 5 W's of site selection before you start building: Wind (find a natural windbreak), Water (be near a water source, but not so close you could flood), Wood (for fire and building), Widowmakers (avoid camping under dead branches), and Wildlife (steer clear of game trails).
Essential Knots for Tarp Shelters
Your ability to create a taut, secure shelter depends on a few key knots. While there are hundreds of knots, mastering these three will cover almost every situation you'll encounter.
-
The Bowline: Often called the "king of knots," the bowline creates a fixed loop at the end of a line that will not slip or jam. It's perfect for creating anchor points on trees or rocks.
-
The Taut-Line Hitch: This is a magical knot that creates an adjustable loop. It's the ideal knot for your guy lines, allowing you to easily tighten or loosen the tension on your tarp to keep it taut in any weather.
-
The Prusik Knot: This is a friction hitch that can slide along a rope when loose but grips tightly when under load. It's incredibly useful for creating adjustable attachment points along your main ridgeline.
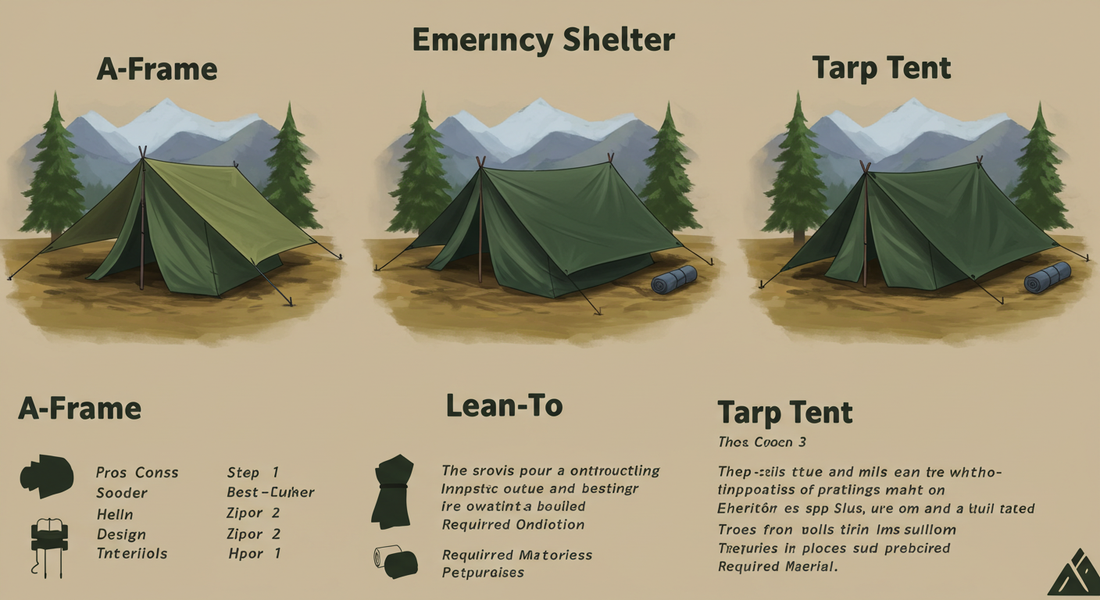
Shelter Configuration 1: The A-Frame
This is the classic, time-tested tarp shelter, excellent for providing two-sided protection from wind and rain.
-
Set Your Ridgeline: Run a rope between two trees at about hip height. This will be the "ridgepole" of your shelter. Use a bowline on one end and a taut-line hitch on the other to get it as tight as possible.
-
Drape the Tarp: Drape your tarp evenly over the ridgeline, like a blanket.
-
Stake the Corners: Pull one side of the tarp down at a 45-degree angle and secure the corner grommets to the ground with stakes. Repeat on the other side, ensuring the tarp is pulled tight to create a crisp "A" shape.
-
Add Guy Lines: For extra stability in wind, use the grommets in the middle of the tarp's edge to attach additional guy lines and stake them out.
Shelter Configuration 2: The Lean-To
The lean-to is one of the fastest tarp shelter configurations to set up and is designed to maximize your warmth by reflecting heat from a fire back at you.
-
Find Your Supports: You can use two trees, as with the A-frame, or a single tree and two stakes. Run a ridgeline between your chosen supports at about chest height.
-
Attach the Tarp: Instead of draping the tarp over the rope, attach the grommets along one of the long edges of the tarp directly to the ridgeline.
-
Stake the Bottom: Pull the bottom edge of the tarp away from the ridgeline and stake it directly to the ground. You should have a single, sloping roof.
-
Build Your Fire: Build your fire 4-5 feet in front of the open side of the shelter. The angled roof will catch and reflect the radiant heat down onto you.
Shelter Configuration 3: The Tarp Tent
For maximum protection from insects and driving rain, you can create a more enclosed shelter.
-
Set a Low Ridgeline: Start with a ridgeline, but set it much lower to the ground—about 2-3 feet high.
-
Drape and Stake: Drape the tarp over the ridgeline. On one side (your "back wall"), stake the edge of the tarp directly to the ground.
-
Create the Floor: Pull the other side of the tarp out, but instead of staking it down, fold it underneath itself to create a floor for your tent. The weight of your body and gear will hold it in place.
-
Close the Ends: Use the extra material at the front and back to fold inward, creating makeshift doors for a fully enclosed, low-profile shelter.
Conclusion: Practice Makes Perfect
These survival tarp skills are your ticket to staying warm and dry when it counts. After setting up your shelter, you can improve its weatherproofing by lowering the profile in high winds or digging a small trench around the edges to divert rainwater. But the most important tip is this: practice. Don't let a real emergency be the first time you try to tie a bowline in the rain. Take your tarp to a local park or your backyard and practice these setups. Familiarity with your gear and skills is the key to confidence and safety.